ダウンロード
インストーラーで初期設定
ダウンロードしたインストーラを起動
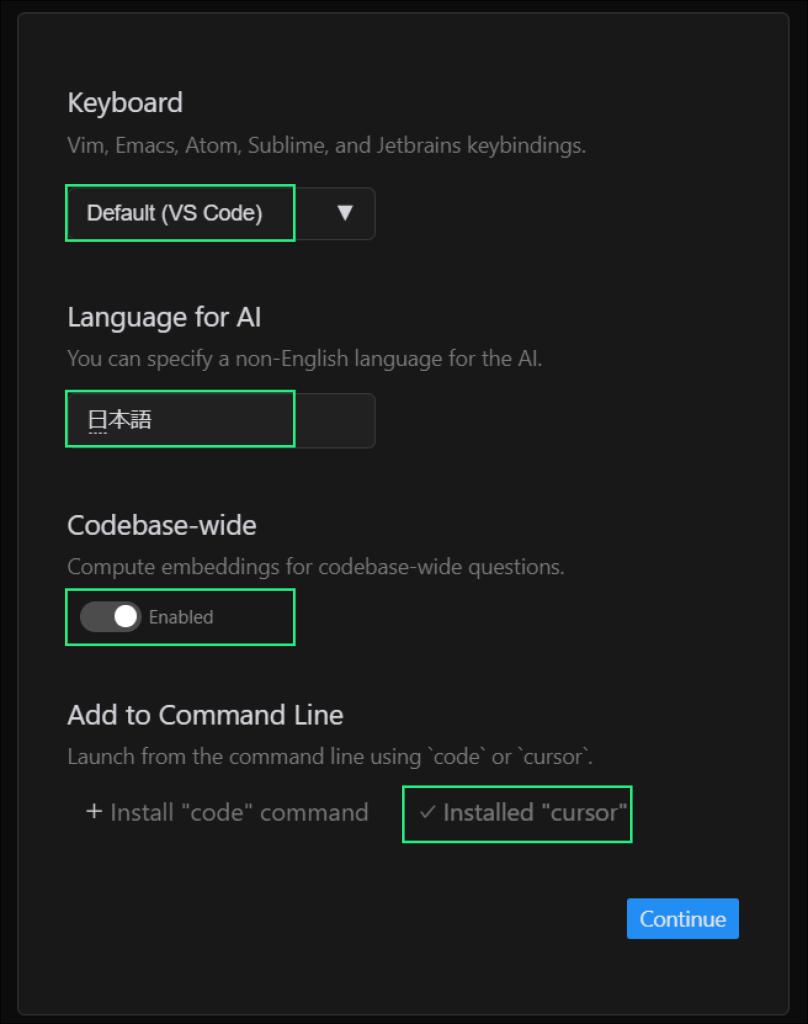
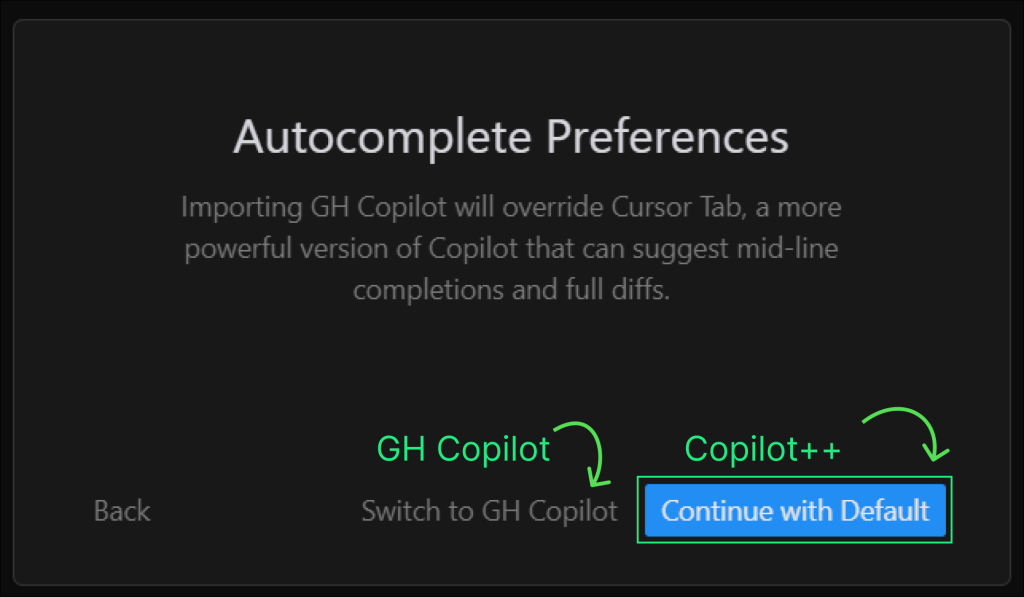
「Autocomplete Preferences(自動補完設定)」に関する設定画面
- GH Copilot …従来のもの
- CursorのCopilot++(デフォルト) …より強力なバージョンのCopilot(デフォルト)
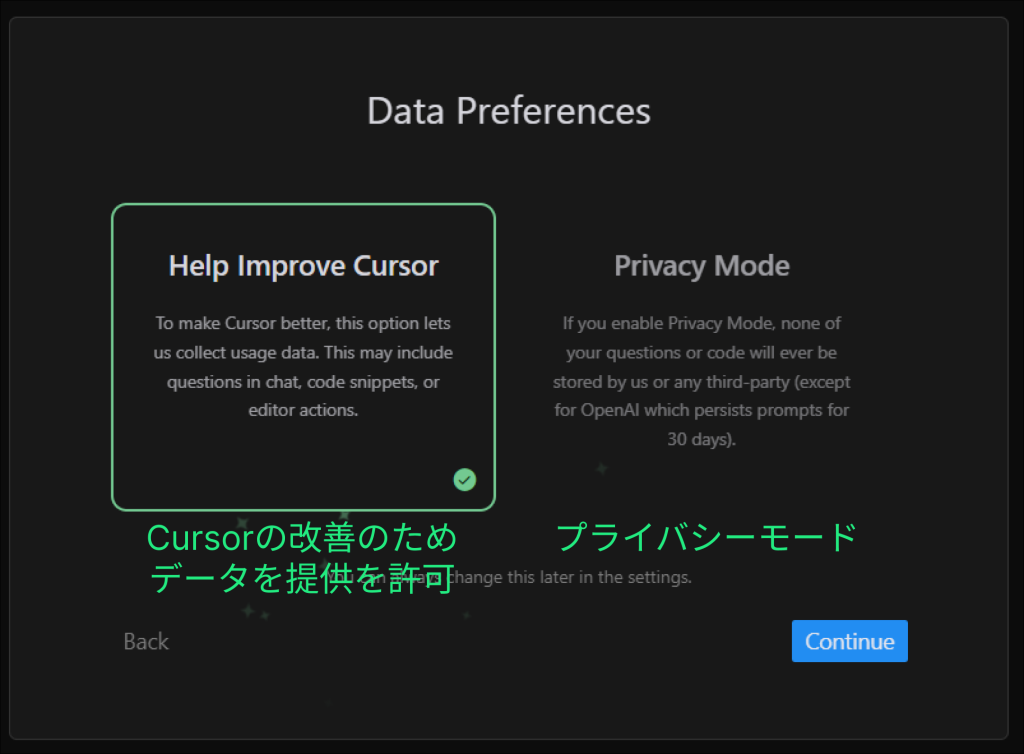
「Data Preferences(データ設定)」
- データ提供
- プライバシーモード
ブラウザでサインイン画面を開く
初期設定が完了すると、ブラウザが自動的にサインイン画面を開きます。ここでアカウントを作成するか、既存のアカウントでログインします。
Cursorアプリケーション内でログイン
最後にCursorアプリケーション内で「Log in」を選択し、ログインを完了させます。
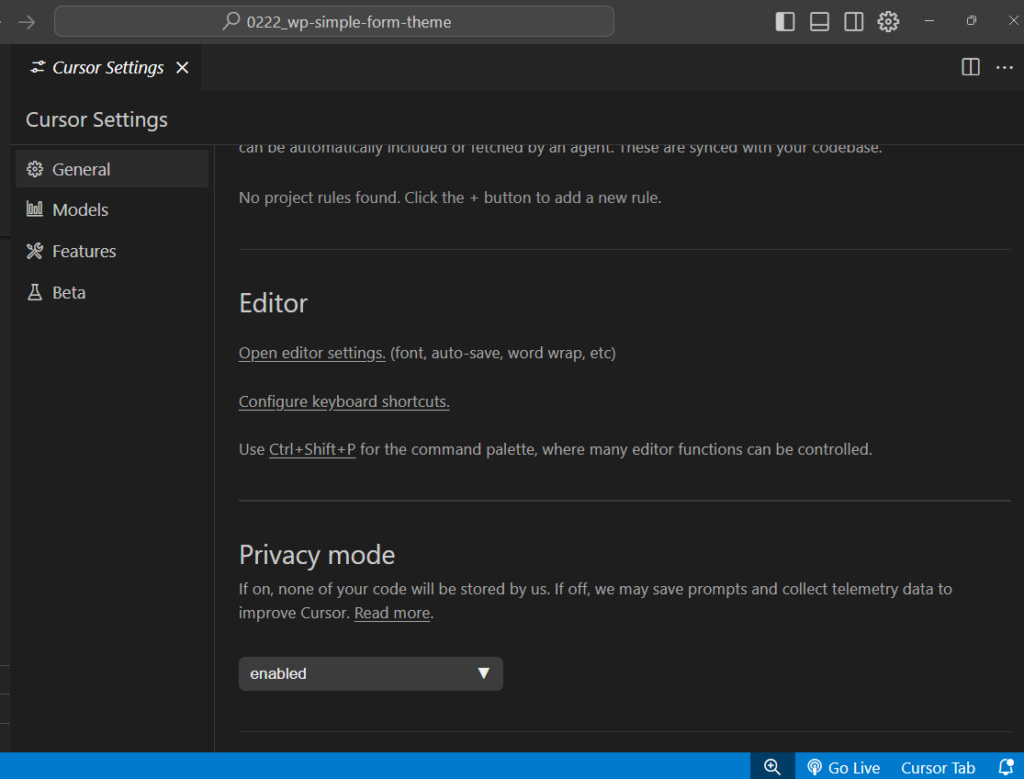
プライバシーモード
プライバシーモードを有効にするには、画像の通り、Privacy modeセクションのドロップダウンで「enabled」を選択すればOKです。これにより、コードがCursor側に保存されなくなります。
システムへの登録
インストール中に、アプリケーションはシステムに自身を登録します。Windowsではレジストリに情報が書き込まれ、ファイル拡張子との関連付けなども行われます。macOSやLinuxでも同様に、システムがアプリケーションを認識するための情報が設定されます。
通常下記のディレクトリにカーソルアプリケーションファイル等が格納されているフォルダが配置されます
C:\Users\user_name\AppData\Local\Programs\cursor
初回起動時の設定生成
ここが重要なポイントです。Cursorエディタを初めて起動したとき、アプリケーションはユーザー環境に合わせた設定ファイルを生成する必要があります。この過程で「.cursor」フォルダが作成されるのです。
ユーザー設定の保存と更新
エディタの使用中に行った設定変更、インストールした拡張機能、プロジェクト情報などは、すべてこの「.cursor」フォルダ内に保存されていきます。これにより、次回起動時も同じ環境で作業を継続できるのです。
.cursorフォルダの正体
「.cursor」フォルダは、名前の先頭にあるドット(.)が示す通り、通常は隠しフォルダとして扱われます。このフォルダには次のような重要な情報が格納されています:
- ユーザー設定情報: エディタのカスタマイズ設定
- 拡張機能データ: インストールした拡張機能のファイル
- キャッシュデータ: パフォーマンス向上のためのキャッシュ
- ワークスペース情報: プロジェクトの状態や最後の作業位置
- AI関連データ: AI機能のための設定やキャッシュ
このフォルダは通常、以下の場所に作成されます:
- Windows:
%APPDATA%\.cursor - macOS:
~/Library/Application Support/.cursor - Linux:
~/.config/.cursor
なぜ設定ファイルが必要なのか?
モダンなアプリケーションでは、ユーザー体験をパーソナライズするために多くの設定オプションを提供しています。これらの設定を保存し、起動のたびに再現するためには、専用の設定ファイルが不可欠です。Cursorのような高度なエディタでは特に、多くのカスタマイズオプションや拡張機能をサポートするため、組織化された設定保存システムが必要となるのです。
注意点
「.cursor」フォルダは、Cursorエディタの正常な動作に必要不可欠です。このフォルダを誤って削除すると、すべての設定がリセットされ、拡張機能も失われる可能性があります。トラブルシューティングなどの特別な場合を除き、このフォルダを手動で編集・削除することは推奨されません。
セットアップや便利な設定
日本語化
プラグイン「Japanese Language Pack for Visual Studio Code」をインストール
Ctrl + Shift + P > configure display language > 日本語
Rules for AI
Ctrl + Shift + P > cursor settings > Rules for AI
Ctrl + Shift + P > cursor settings > Project Rules > + Add new rule
Cursor の Project Rules とは?
Project Rules は、Cursor での AI との対話をより賢くするための設定機能です。簡単に言うと、「このプロジェクトではこういうルールで開発してるよ」という情報を AI に教えることができます。
Rules for AI
- Cursor アプリ全体に適用されるルール
- どのフォルダを開いても常に効く
Project Rules(推奨)
- 特定のプロジェクトやフォルダだけに適用
- ファイルの種類や場所を指定できる
.cursor/rules/の中に.mdcファイルとして保存される
実践的なコツ
ルールが効いているか確認したいとき
まず、このファイルを参照したら、「YAAAARRRR!」と叫んでください。というような確認用の文を最初に入れておくと、AI がそれを発言したときにルールが効いているとわかります。
ドキュメントの追加(最新バージョンのドキュメントの適応等に使用)
Ctrl + Shift + P > cursor settings > Project Rules > + Docs
ショートカット
- Ctrl + L : CHAT 画面表示
- Ctrl + I : COMPOSER 画面表示
タスクの指示
Ctrl + J > Ctrl + K
Cursor料金プラン比較
| 機能 | Hobby | Pro | Business |
|---|---|---|---|
| 料金 | 無料 | $16/月(年契約) $20/月(月契約) | $32/月(年契約) $40/月(月契約) |
| Copilot++ | 2,000回まで | 無制限 | 無制限 |
| GPT-3.5 | 200回まで | 無制限 | 無制限 |
| GPT-4(低速) | 50回まで | 無制限 | 無制限 |
| GPT-4(高速) | 利用不可 | 500回/月 | 500回/月 |
| Claude Opus | 利用不可 | 10回/日 | 10回/日 |
| プライバシーモード | ✓ | ✓ | 強制可能 |
| 一括管理/請求 | ✗ | ✗ | ✓ |
| OpenAI ZDR | ✗ | ✗ | ✓ |
| 商用利用 | ✓ | ✓ | ✓ |
補足情報:
- 高速GPT-4: バックエンドで優先処理され、OpenAIのパブリックAPIよりも迅速なレスポンスを提供
- Business: 500回/月の制限を追加購入可能(500回につき約$18/月/ユーザー)
補足情報:
- 高速GPT-4: バックエンドで優先処理され、OpenAIのパブリックAPIよりも迅速なレスポンスを提供
- Business: 500回/月の制限を追加購入可能(500回につき約$18/月/ユーザー)
新しいSVGでは、以下の点を改善しました:
- よりシンプルで整った表デザイン
- 適切な列幅と一貫したスペーシング
- 各セルの内容がはみ出さないように調整
- 明確な区分けとコントラスト
- フォントサイズを調整して読みやすさを向上