Laravelの主な認証方法たち
Laravel Breeze
- シンプルな認証スターターキット。
- Blade or Inertia(Vue/React)対応。
- ログイン、登録、パスワードリセットなど、基本機能がすぐ使える。
- 学習目的・小〜中規模アプリにぴったり!
Laravel Jetstream
- Breezeの進化系。
- Inertia(Vue)か Livewire が前提。
- チーム管理、2要素認証、セッション管理など高機能。
- 大規模 or ユーザー管理が複雑なアプリ向け。
- UIの自由度はちょっと低め。
Laravel Fortify
- Jetstreamの「バックエンドだけ版」。
- 自分でフロントを作りたい人向け。
- APIベースで、SPAやモバイルアプリと相性よし。
- 独自UIを作るけど認証ロジックは任せたい派向け。
Laravel Sanctum
- API認証用のトークンベース認証(SPAやモバイル向け)。
- セッションクッキーを使ったSPA向け認証 or APIトークン認証どちらも可。
- トークン制御が柔軟で、SPA開発によく使われる。
Laravel Passport
- OAuth2対応のがっつりAPI認証。
- 外部サービスへの提供とか、本格的なAPI認証に。
- 重たい & 学習コスト高め、なので今はSanctumのほうが人気。
Laravel UI
Laravel 6,7のころからある
Laravel8からはLaravel/uiは非推奨になってますが、jQueryベースでtailwindやvueやLivewireを使用しないで済むという点から使用しているエンジニアもおられます
保守では最新でない場合もあるので、対応しないといけない場合もある
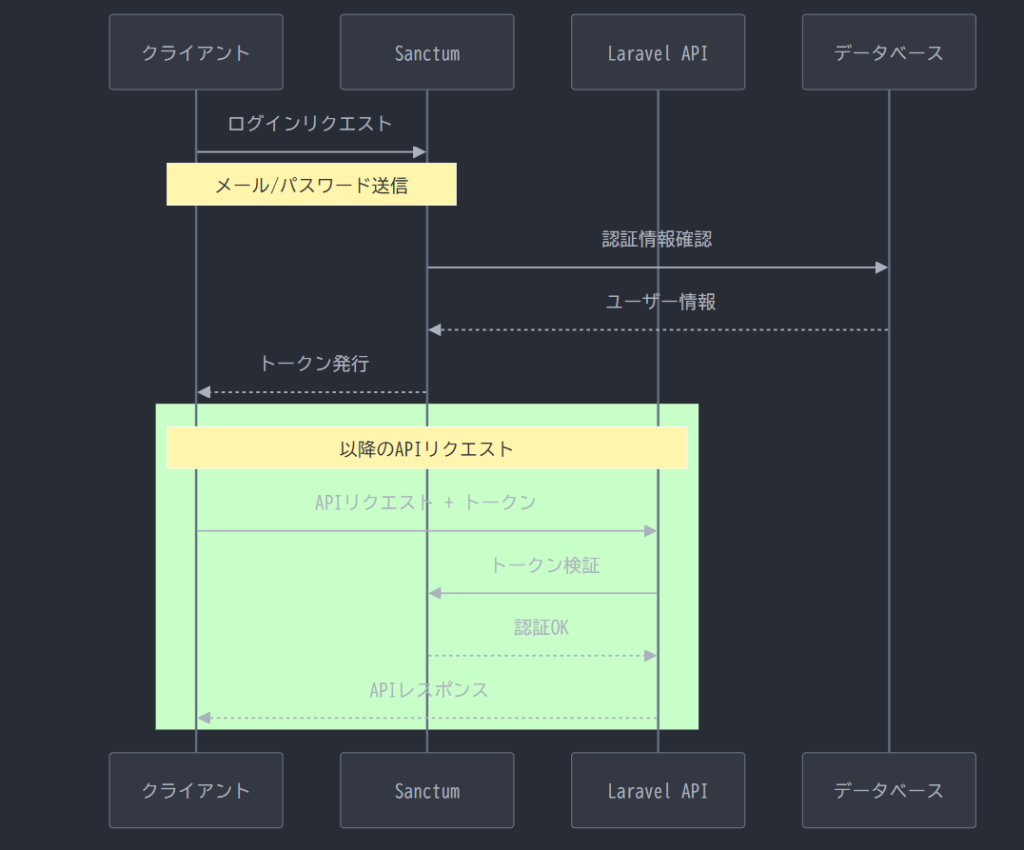
Sanctumでシンプルな認証
トークンベースの認証により、ステートレスなAPI通信が可能
一般的な例
実行時に自動で personal_access_tokens テーブルが作成
mysql> desc personal_access_tokens;
+----------------+---------------------+------+-----+---------+----------------+
| Field          | Type                | Null | Key | Default | Extra          |
+----------------+---------------------+------+-----+---------+----------------+
| id             | bigint(20) unsigned | NO   | PRI | NULL    | auto_increment |
| tokenable_type | varchar(255)        | NO   | MUL | NULL    |                |
| tokenable_id   | bigint(20) unsigned | NO   |     | NULL    |                |
| name           | text                | NO   |     | NULL    |                |
| token          | varchar(64)         | NO   | UNI | NULL    |                |
| abilities      | text                | YES  |     | NULL    |                |
| last_used_at   | timestamp           | YES  |     | NULL    |                |
| expires_at     | timestamp           | YES  | MUL | NULL    |                |
| created_at     | timestamp           | YES  |     | NULL    |                |
| updated_at     | timestamp           | YES  |     | NULL    |                |
+----------------+---------------------+------+-----+---------+----------------+
10 rows in set (0.10 sec)
認証ミドルウェアmiddleware('auth:sanctum') とは?
ミドルウェアを使用したRoute設定について説明します、例えば下記のようなルートの記述があります
認証を通過した場合のみ、プロフィールを取得できる機能のリクエストです
Route::middleware('auth:sanctum')->group(function () {
    Route::get('/profile', [UserController::class, 'show']);
});
「Sanctum 認証を通過したリクエストのみ処理する」という設定です
もう少し内部的な仕組みを順を追って説明します
middleware(‘auth:sanctum’) ミドルウェアをlaravel\app\Http\Kernel.phpで特定します
    protected $middlewareAliases = [
        'auth' => \App\Http\Middleware\Authenticate::class,
auth → App\Http\Middleware\Authenticate クラスのエイリアスとわかります(Laravelをインストールした直後から、最初から書かれています)
<?php

namespace App\Http\Middleware;

use Illuminate\Auth\Middleware\Authenticate as Middleware;
use Illuminate\Http\Request;

class Authenticate extends Middleware
{
    /**
     * Get the path the user should be redirected to when they are not authenticated.
     */
    protected function redirectTo(Request $request): ?string
    {
        return $request->expectsJson() ? null : route('login');
    }
}
注目すべきポイントは、そのクラスが extends Middleware している点です。上部の use 文を見ると、Laravel本体の機能(Illuminate\Auth\Middleware\Authenticate)を継承していることがわかります。
Illuminate\Auth\Middleware\Authenticateを見てみます
※ミドルウェアの呼び出しについて
handle()メソッドがはミドルウェアの実行メッソドでlaravelが自動的に呼び出します
    /**
     * Handle an incoming request.
     *
     * @param  \Illuminate\Http\Request  $request
     * @param  \Closure  $next
     * @param  string[]  ...$guards
     * @return mixed
     *
     * @throws \Illuminate\Auth\AuthenticationException
     */
    public function handle($request, Closure $next, ...$guards)
    {
        $this->authenticate($request, $guards);

        return $next($request);
    }

    /**
     * Determine if the user is logged in to any of the given guards.
     *
     * @param  \Illuminate\Http\Request  $request
     * @param  array  $guards
     * @return void
     *
     * @throws \Illuminate\Auth\AuthenticationException
     */
    protected function authenticate($request, array $guards)
    {
        if (empty($guards)) {
            $guards = [null];
        }

        foreach ($guards as $guard) {
            if ($this->auth->guard($guard)->check()) {
                return $this->auth->shouldUse($guard);
            }
        }

        $this->unauthenticated($request, $guards);
    }
guard($guard)->check()
$guardはRoute::middleware(‘auth:sanctum’)の:の以降の引数、この場合はsanctumです
shouldUse($guard):
「このリクエストの間は、このガードをメインで使うよ」とシステムに記憶させます。これにより、コントローラーで Auth::user() と書くだけで正しいユーザーが取れるようになります。
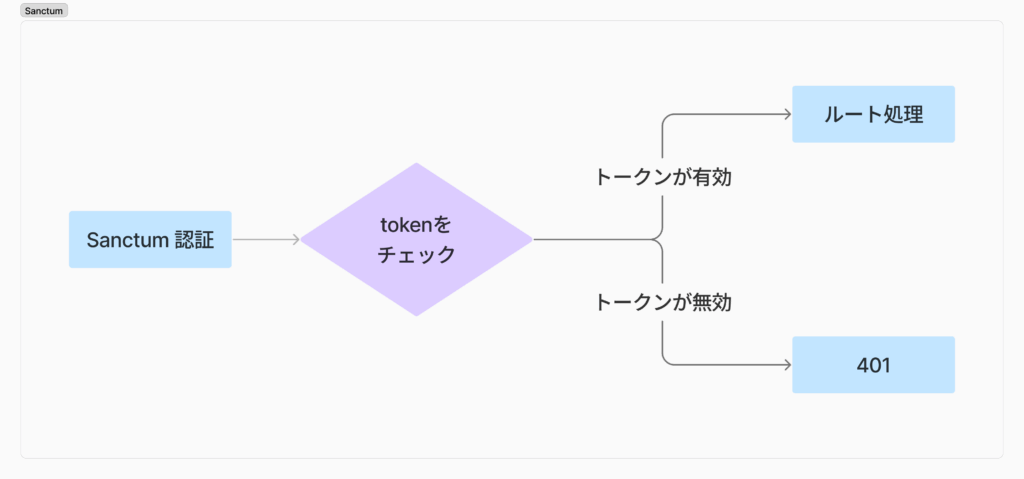
- Authorization: Bearer {token} ヘッダーをチェック
- トークンが有効 → ルート処理へ Route::get(‘/profile’, [UserController::class, ‘show’]);
- トークンが無効 → 401 Unauthorized を返す
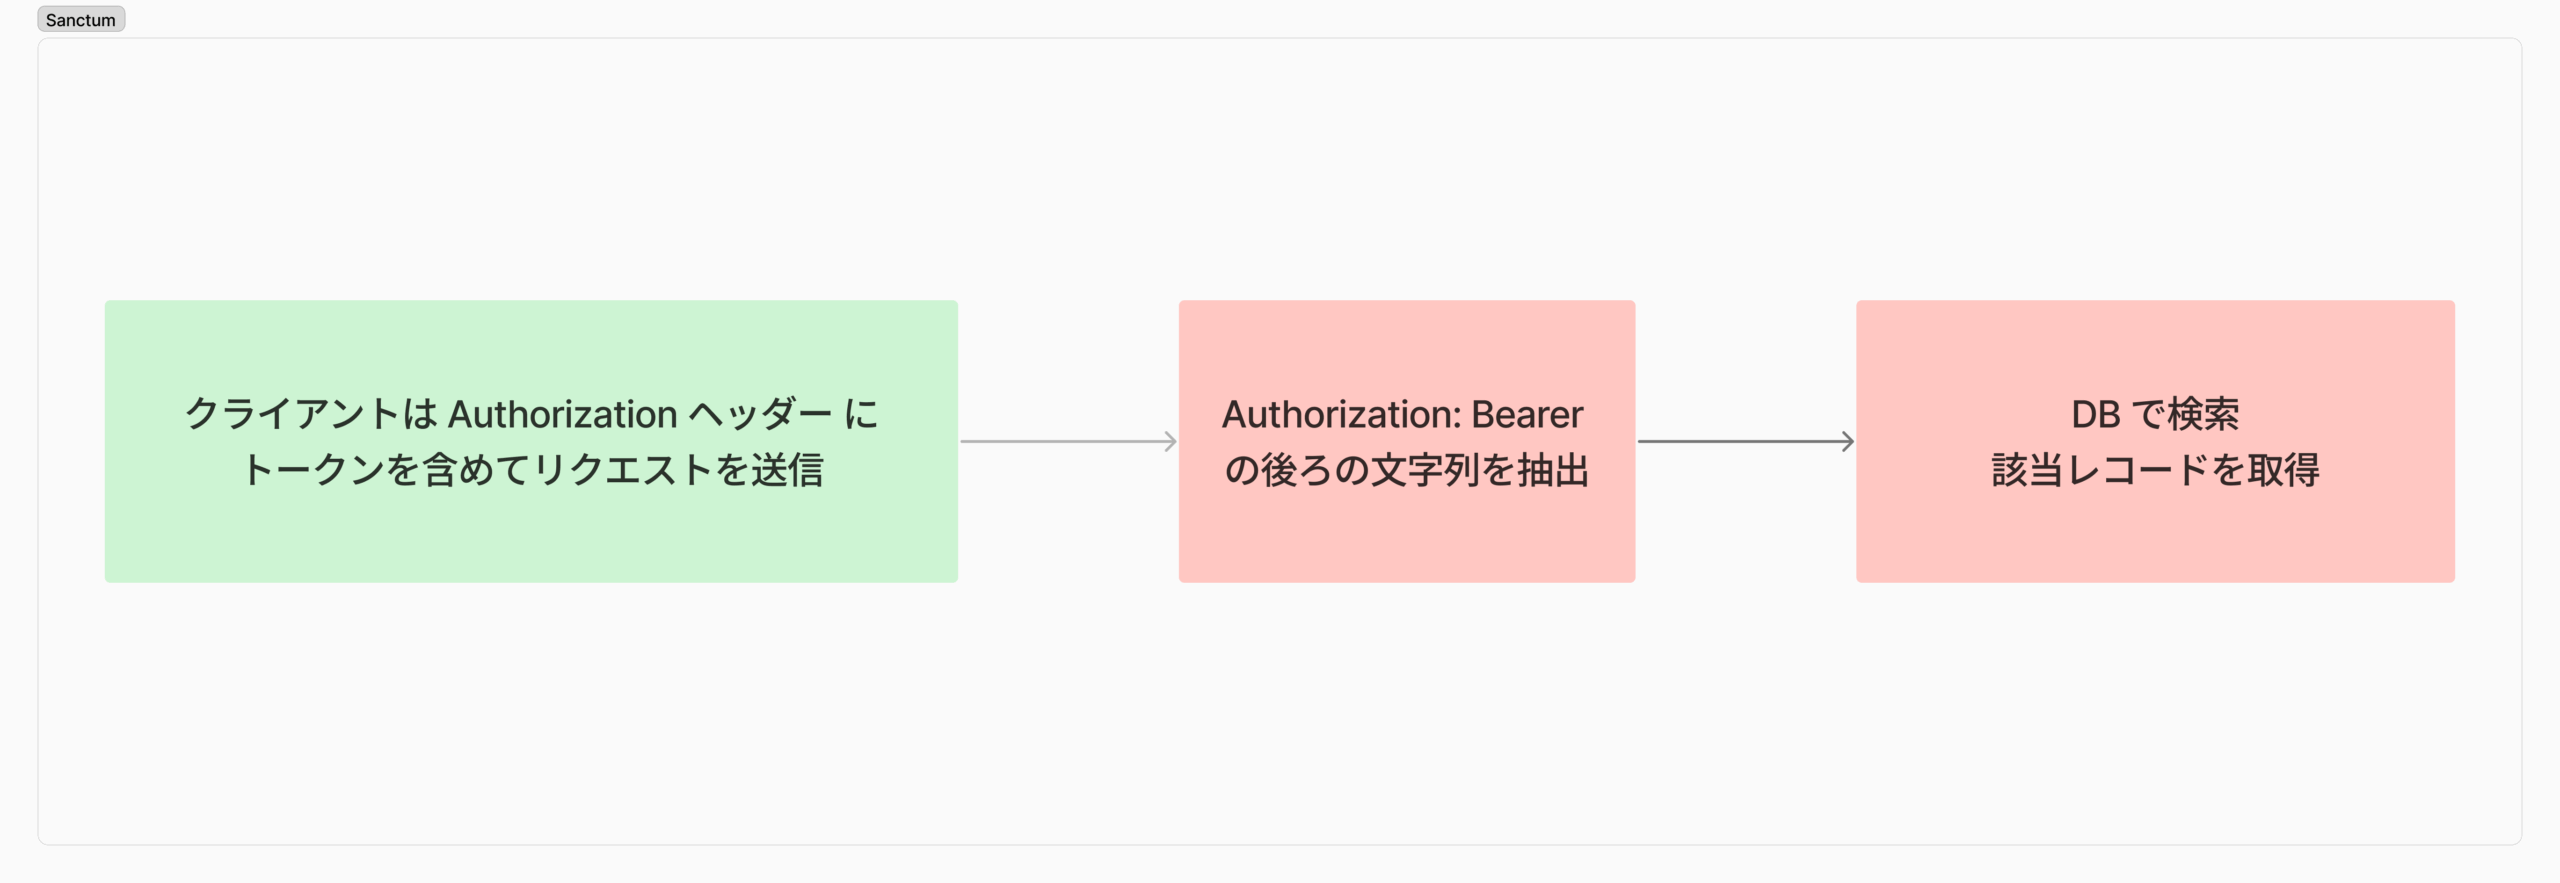
トークンチェックの具体的プロセス
- ヘッダーからトークンを取得
Authorization: Bearerの後ろの文字列を抽出 - トークンを分割
3|abc...を|で分割 → ID と平文トークンに - DB で検索
personal_access_tokensテーブルから該当レコードを取得 - 結果
- 全てクリア → 認証成功、ルート処理へ
- いずれか失敗 → 401 エラー